Assigning Attributes in the Inventory List View
You must use the
Inventory List view to assign attributes and select their values within the
Inventory Navigator. Once attributes are created and their values defined, you can assign their values to objects represented in the
Inventory. A set of predefined
System Attributes are included in the Portal software. Once values are defined for the system attributes, you can assign them. In the
Inventory List view, you can select a single object or a group of objects and assign or modify attribute values associated with them. See also
Managing Attributes.
Limitations
• Attributes cannot be assigned to LUNs. All other objects represented in the Inventory allow attribute assignment.
To assign attributes and set values in bulk
1. Select
Inventory.
2. Navigate to the object category.
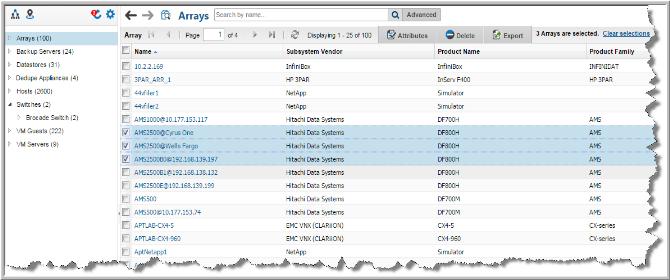
3. Toggle to the Inventory List view. You can select all the objects on the page by clicking the checkbox on the top of the management page. Note that only the objects displayed on a single page are selected.
4. Click Attributes. The Assign Attribute Values to Objects dialog shows if attributes are actively used in the Inventory hierarchy. It also allows you to set or modify an attribute (or multiple attributes) for all the inventory objects selected. If no value is set for an attribute, the field is blank. If different attributes’ values are set for the selected objects, the value displays Multiple Values.
5. Double-click the
Value field beside the attribute. A drop-down list is activated.
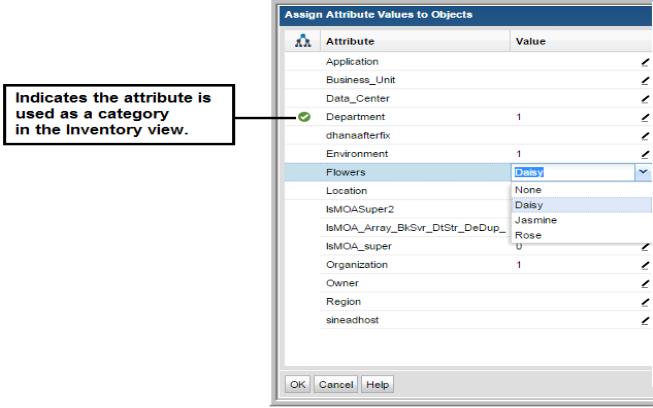
6. Choose a value to assign to the selected hosts. If the value is displayed as Multiple Values, the new value is applied to all selected hosts and will overwrite any previously set attribute. You can set multiple attributes at once.