Install the Oracle Binaries
1. Log in to the Portal server as an Administrator.
Oracle requires that you are logged in using an account that has administrative privileges.
2. Download the executable file to your Windows Portal server.
3. Double-click the executable file.
hsv_dbinstaller_<versionNumber>_win.iso
The version number could be, for example, 12102.
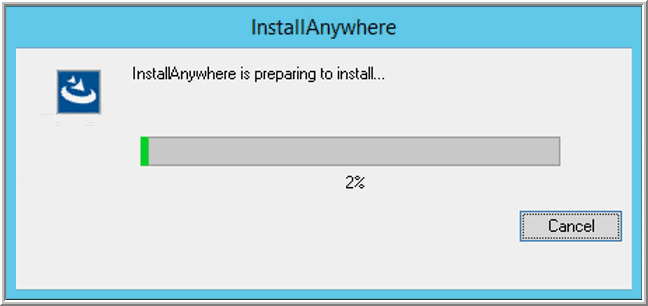
4. The InstallAnywhere installation wizard will begin extracting files.
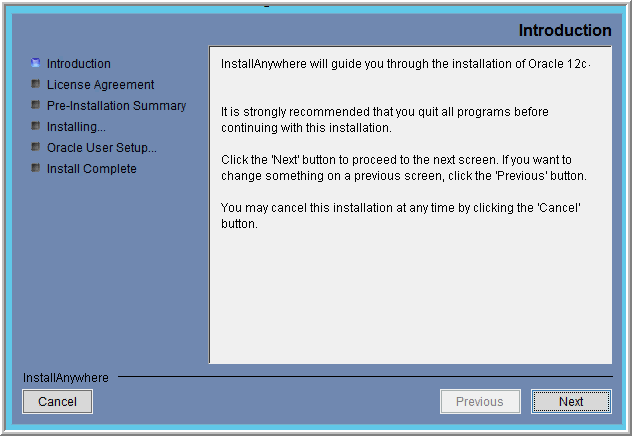
5. Once the files have been extracted, the Introduction window will display. Click Next to begin the installation process.
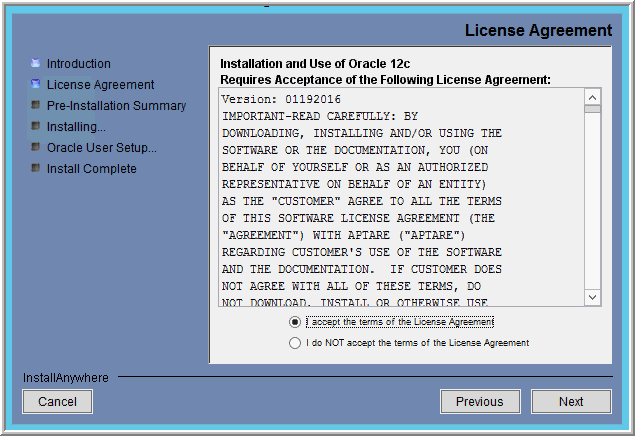
6. Read and accept the end-user license agreement (EULA) and click Next.
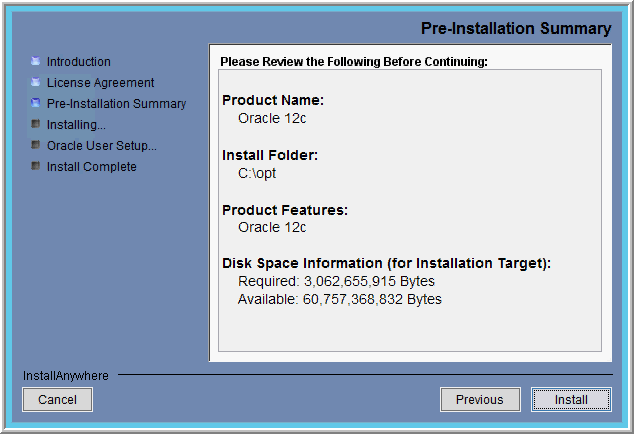
7. Review the Pre-Installation Summary, which summarizes the product components that will be installed and describes the available and required disk space for these components.
Note: The requirements shown on the following example screen may not match the requirements displayed on your installation screen. Refer to the actual Pre-Installation Summary screen for the current requirements.
8. Click Install to start the installation of the Oracle application binaries, which places files into the C:\opt folder on your Windows server.
• The progress bar displays the component being installed and the progress of the installation overall.
• The command prompt window will briefly display as it is removing pre-existing environment variables.
• The Oracle application binaries will be installed on the C:\ drive. The database itself, however, can be created on an alternate drive during the Portal installation.
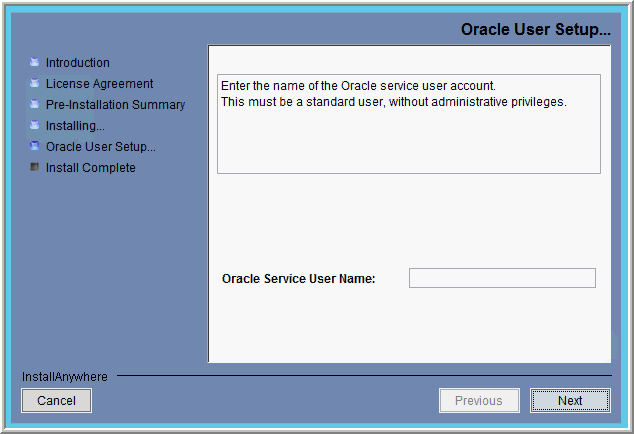
9. Enter the name of a valid user account for the Oracle Service User and click Next.
To install the Oracle services, Oracle requires a user account that does not have administrative privileges. This is often referred to as the Oracle Home User and it becomes the owner of the Oracle services.
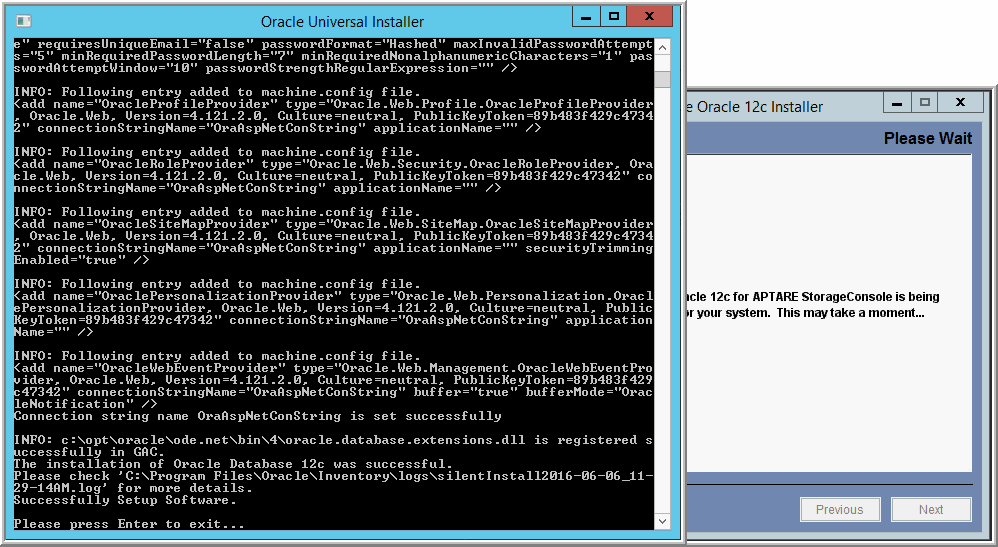
10. At this point, the Oracle Universal Installer will take over the session and start its process in the Windows command prompt window. Further actions will not be available in the InstallAnywhere window (tucked behind the command prompt window) until the Oracle Universal Installer successfully completes.
11. When the Oracle Universal Installer completes its process successfully, press Enter.
The command prompt window once again takes over to start the Oracle services.
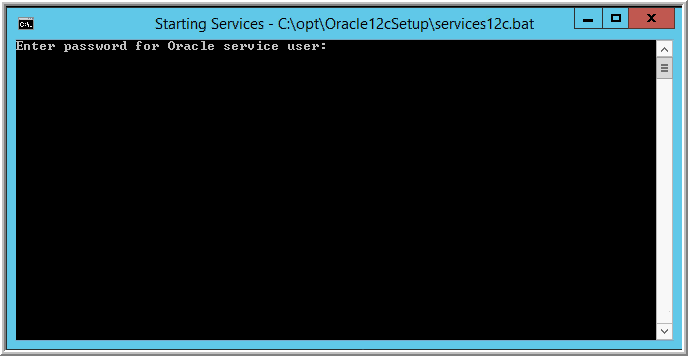
12. In the Starting Services command prompt window, enter the password for the account that you have identified as the Oracle service user. You will not see your keystrokes echoed in the window.
You will be prompted twice for the Oracle Service User password, but the prompts are different:
• Enter password for Oracle service user:
• Enter <account name>’s password:
If you enter an incorrect password too many times, the account may get locked out. To unlock the account, see
Account Lockout.
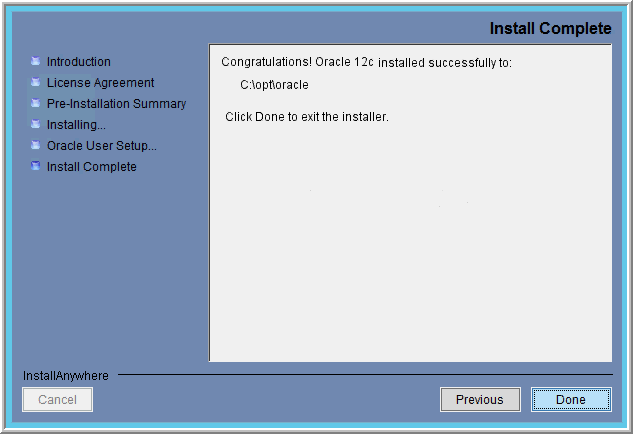
13. Return to the InstallAnywhere window and click Done.
At this point, the Oracle Application binaries have been installed on your server and Oracle services have been created.
This completes the installation of the Hitachi Storage Viewer Oracle Application component. The next step is to install the Hitachi Storage Viewer Portal Software components, as described in
Task 4: Installing Portal Application Binaries (Windows).