Adding Attributes
To add attributes
1. Select
Admin >
Advanced >
Attributes.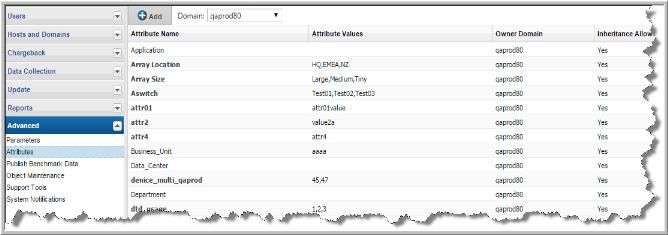
2. From the drop‑down list, select the domain to which you want to add the attribute. Your domain is displayed by default. Typically, only one domain is available and this domain selection is required only for multi-tenancy environments, such as Managed Services Partners (MSPs). When you add or delete attributes, you do so globally for your domain and all child domains. See also
Attribute Inheritance Overrides.
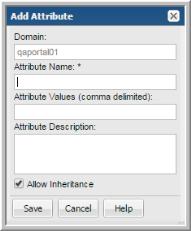
3. Click Add. The Add Attribute dialog is displayed.
4. Enter a name (see
Attribute-Naming Rules), a comma-separated list of values, and an optional description. The description will be displayed in the Dynamic Template Designer when you are creating report templates.
When you add an attribute, a validation process ensures that the attribute does not exist in the domain’s single hierarchy path. Duplicate attribute names are allowed only in sibling domain hierarchies. See
Attribute Inheritance.
The Allow Inheritance checkbox is checked by default to set a flag that enables child domains to inherit the attribute’s values. Uncheck this box if you do not want child domains to inherit this attribute’s values.
When inheritance is disabled, users in sub-domains will be able to see the attribute, but they will not be able to see values in the
Inventory or in a report scope. However, an administrator at the sub-domain or parent level can override the values of the attribute, making the attribute’s values available to the sub-domain. See
Override Inherited Attribute Values.
5. Enter a comma-separated list of values.
Values must be unique and are case-insensitive.
6. Click OK in the Add Attributes dialog. The new attribute is displayed.