Configure VMware Access
The VMware Data Collector uses the VMware Infrastructure SDK to make XML API calls over HTTP to retrieve data from ESX servers. The VMware Data Collector is multi-threaded, enabling it to poll up to five vCenters in one polling cycle.
VMware requires the following access for data collection:
1. View-only VMware User ID that has a role with the following privileges:
• Read-Only
• Browse Datastore
2. Assign the user to the root-level folder permissions of vSphere.
The administrator user who provisions the read-only role for collection must be an administrator at the root level, not just at a data center or other level. If multiple vCenters are available for administration in the client (Linked Mode), that administrator user must be provisioned at the root level for each vCenter Server from which data is collected.
3. Port 443 must be open. Data collection uses HTTPS without certificate validation for encrypted connections. This allows the use of a self-signed certificate on the VMware server.
Creating a VMware Read-Only User with Required Permissions
The following procedure provides the steps for creating and configuring a vSphere user with the necessary permissions for Storage Viewer for Virtual Servers data collection access.
1. Create a new vCenter user to be used with Hitachi Storage Viewer. For the purpose of the examples in this document, we’ll name the user hds.
2. Log in to vSphere with Administrator credentials to create a user with new permissions.
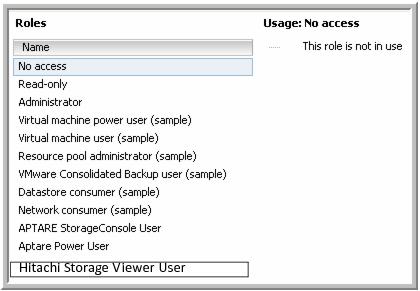
3. In the Home page (Alt+Home), click Roles under the Administration heading.
4. In the Roles window, right-click on Read Only and select Clone.
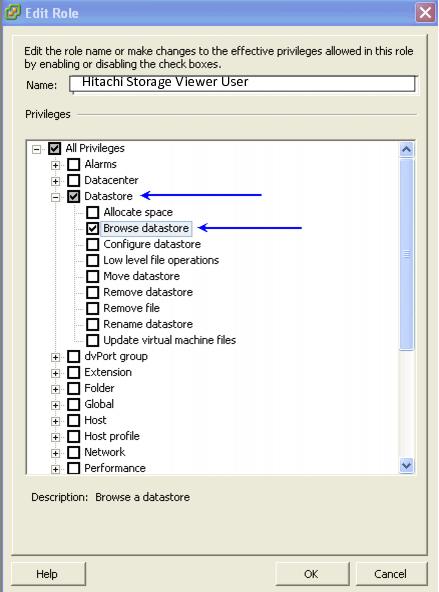
5. Name the role Hitachi Storage Viewer User.
6. Right-click on the Role you just created—Hitachi Storage Viewer User— and select Edit Role.
7. The only permission that is required beyond the Read-Only role is Browse Datastore. Select Browse Datastore and click OK.
8. At the top of the vSphere window, select Administration > Inventory > Hosts and Clusters.
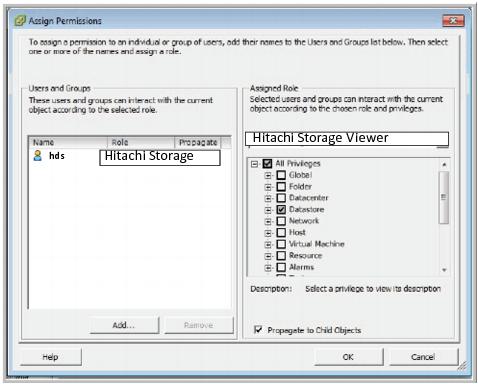
9. At the left of the vSphere window, right-click on the Root of the tree—in this example, esxvsphere—and then select Add Permission.
10. In the Assign Permissions window, under Assigned Role, select
Hitachi Storage Viewer User and under Users and Groups, add the user that you created in
Step 1 and click
OK.
11. Once the user has been added, you should see it listed under the Permissions tab.
12. Now you are ready to add the user to the Storage Viewer Portal. Be sure to enter the user name exactly as it is displayed in the Permissions tab (it is case sensitive). If you are using a Domain account, also include the Domain in the User ID field (for example: domain.com\hds).